Laying Pavers Part 4 – Laying Pavers August 12, 2017
Now that we have prepared a good solid base for our pavers, that is we have excavated to the appropriate levels and we have 75mm of compacted crushed rock/road base in place at approx. 60mm below our finished height of paving, we can commence laying the pavers.
Setting up a String Line
Firstly, we need to set a string line to the finished height of the paving; preferably along a joint in the paving. Secure the stringline to a metal stake or peg at both ends and pull it as tight as possible. You’ll be using this stringline as a guide for the height of your paving, so the less sag in the line, the better.
Mixing a Mortar Mix
Many people lay pavers on sand only or sand and cement, however for a truly professional job that will stand the test of time all paving should be laid on mortar. In a cement mixer or wheelbarrow mix sand and cement together at a ratio of 4 sand to 1 cement. Once the sand and cement are a consistent grey colour, add water and continue to mix. The perfect mortar mix should have the plasticity of moulding clay, without being too wet or dry.
Laying Pavers
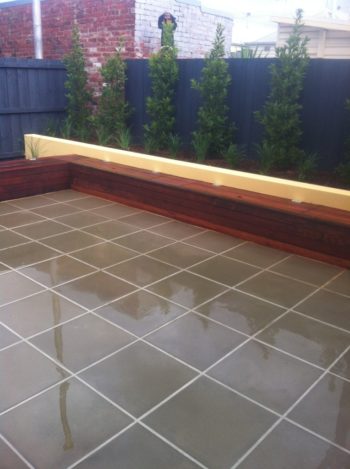
Use a trowel spread the mortar to a thickness of 20mm and tap your 40mm thick pavers into position using a rubber mallet. Make sure that one edge of the paver is tapped down to the same height as the string line. A spirit level will also aid you in achieving the appropriate fall toward drainage points if needed. Allow a 5-7mm grout joint between each paver. Move the stringline along each row as you lay. Once you’ve laid all the full pavers possible you’ll need to mark cut pavers with a pencil and ruler. A brick saw or grinder can be used to cut pavers. It does take practice to become efficient at cutting pavers accurately.
Grouting
Mix up a strong grout mix of 3-parts sand and 1-part cement. Add coloured oxide if needed. Add water and continue to mix until you achieve a very wet consistency. Spread the grout over the paving and agitate with a foam trowel or squeegee until the mix has filled the 5-7mm joins between the paving. Sponge the area clean from excess mixture. The area may have to sponged several times to achieve a clean surface, with the water being changed regularly.
Washing and Sealing
Wait at least 7 days after you’ve grouted to give the paving a light acid wash. This will remove any haze makes that can be left behind from grouting. Only a diluted mix of nitric acid should be used to clean pavers not Hydrocloric; it is too strong and will only eat away at your pavers. Once the paving is clean, allow it dry out completely. This can take some time in Winter, especially with frequent rain showers, however it’s important that the area be bone dry before sealing. Seal the pavers using a penetrating sealer, which can be applied by either a roller or sprayed on using a garden sprayer. Always apply two coats and follow directions on the container.
Happy Paving


